Showing posts with label Tim Holtz. Show all posts
Showing posts with label Tim Holtz. Show all posts
Wednesday, July 20, 2011
OK OK OK ....
I have heard your pleads for pictures and details of my week at CHA.

It has been AMAZING!!!
Learned a lot, saw a lot of friends, made new friends, and it's not over yet!!!
It all started with my Ranger Avenue class on Monday taught by Jenni Bowlin, Claudine Hellmuth, and the legendary Tim Holtz!

These were our supplies waiting for us when we walked into class.

This was our final finished piece put together.
Each teacher taught and we made their "door" in their style and then we put them all together with a nail hinge.
From left to right - Jenni Bowlin's door, Claudine Hellmuth's door, and Tim Holtz's door
For Jenni's door we used Studio paint, her ink, and a lot of her paraphernalia.
For Claudine's door we used Studio paint, inked embossed metal, and her stamps
For Tim's door we used tissue tape, distress stains, distress inks, and lots of paraphernalia.

After class he even signed my book (Compendium of Curiosities) for me!
Next was my Melt Art class .... and I must say WOW!!!
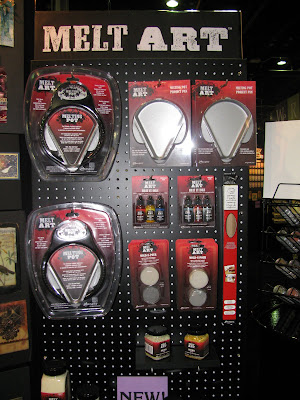
This is the display of the new Melt Art by Tim and all of the new packaging.
Tim has taken over this line at ranger as the previous woman who was doing it has retired .... and again ... all I can say is WOW ... be prepared to be re-introduced to UTE (Ultra thick Embossing Powder)

Here is what our stations looked like for the Melt Art class.
Yummy.....
Now we did ALL of the following with one fill up of the Melting Pot with the clear UTE! and then colored along the way

This was a charm that was provided by Vintaj (more about them in another post). We took their antique charm and used the back underside. We inked it and then poured the clear UTE in the back of it.

These are Prima flowers that we dipped in the clear UTE and it crystallized them for this brooch.

These were shrinky dinks that we put in the UTE for a extra glossy effect. we then inked them and added photos.

This is clay that you can make molds out of. We used the white flower button as out mold and them we made rings by coloring the UTE and putting it into the mold. We added a brad while it was cooling and then attached it to a ring. I made one out of black a little later.

Next we added a stripe of white, black, and pewter to our pots and swirled it into a Memory Frame.

After that we turned the UTE black and then dipped chipboard pieces into it. we then quickly stamped words on it for a fun effect. These were then colored using Perfect Pearls. (much prettier in person)

The final project intrigued me ... We laid a Memory frame onto a stamp (with swirls) ... We then poured the UTE into the frame and let it cool. When we picked it up .. viola ... the fun swirls were back. We colored this with perfect pearls too.

Today I was at the Ideology booth to make a Make and Take and who should walk up to be my teacher but Tim Holtz himself ... me and him one on one! Ahhh!

We made this birdcage while chatting about his AWESOME Melt class! See the owl in the back of the birdcage ...

Here I am with my new BFF (sorry Kim!!!)
ENJOY!!!
Hope to have more tomorrow!!!!!
Subscribe to:
Posts
(Atom)
InkyStamper Store

Contact Me

or Call/Text 815-218-2916
